


Make sure that the power is turned on.
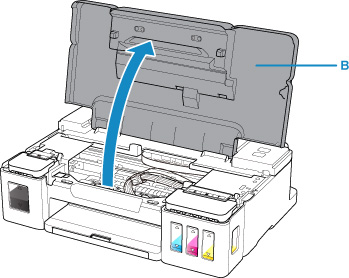
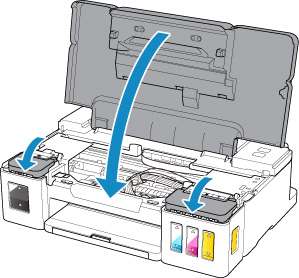
Open the top cover (B).
 Important
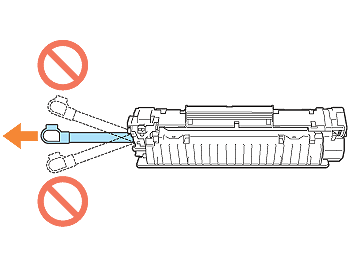
- Do not touch tubes or other parts inside the printer. This can cause trouble with the printer.
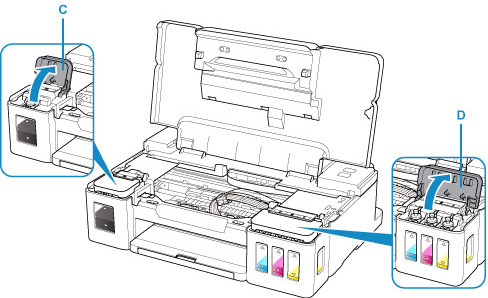
Open the ink tank cover.
To refill the black ink tank, open the left ink tank cover (C).
To refill color ink tanks, open the right ink tank cover (D).
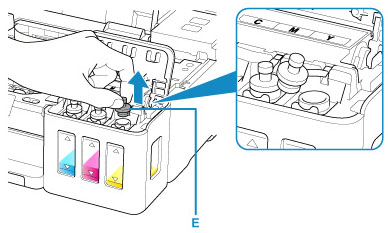
Grab and remove the tank cap (E) of the ink tank to be refilled.
 Important
- Carefully remove the tank cap of the ink tank. Ink on the inside of the tank cap may spatter when removing it.
Take a new ink bottle out of its package.
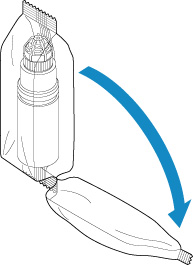
Hold the ink bottle upright and twist the bottle cap (F) to remove.
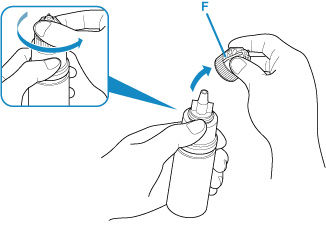 Important
- When removing the bottle cap, avoid squeezing the sides of the ink bottle. Hold the ink bottle as shown in the figure above. If you push the sides of the ink bottle, ink will spatter.
- Do not shake the ink bottle. Ink may spatter when opening the cap.
- Even if the ink bottle is dented, the ink contained in the bottle can still be used without problem.
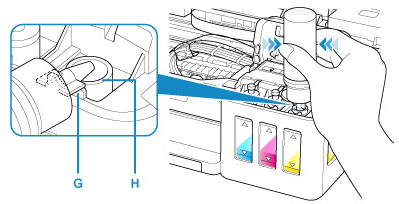
Refill the ink tank.
Aligning the nozzle of the ink bottle with the bottle guide (G) on the printer, insert the nozzle into the inlet (H).
Next stand the ink bottle upside down and squeeze the sides of the ink bottle to refill the ink tank.
 Important
- Make sure that each color of ink tanks is filled with corresponding color of ink bottles.
- When refilling ink tanks, do not squeeze the bottle sides too hard. Ink may spatter.
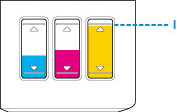
Do not fill the ink tank above the ink tank’s upper limit line (I). Ink above this line may spill over, causing malfunction or damage to the printer, and preventing the printing operation.
- After refilling ink tanks, close the bottle cap of the ink bottle securely.
- Discard empty ink bottles in compliance with local laws and regulations regarding disposal of consumables.
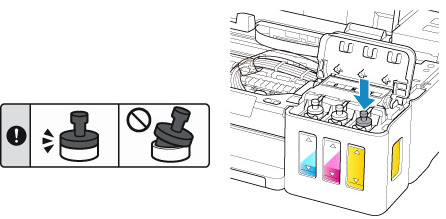
Recap the inlet with the tank cap of the ink tank.
Make sure the tank cap is completely inserted.
 Note
Note- When inserting the tank cap, be careful not to twist the tank cap rubber.
Close the ink tank cover.
Important- If you cannot properly close the ink tank cover, check if you forgot to insert any tank caps of the ink tanks.
Lift the top cover up slightly and then gently close it.
 Note
Note
Make sure that the power is turned on.
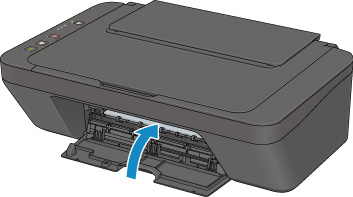
Retract the paper output tray and the output tray extension.
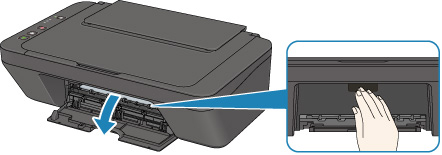
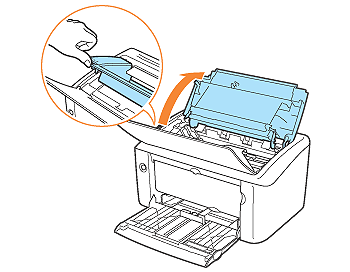
Open the cover.
The FINE cartridge holder moves to the replacement position.
 Caution
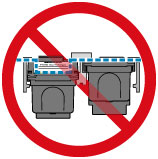
- Do not hold the FINE cartridge holder to stop or move it forcibly. Do not touch the FINE cartridge holder until it stops completely.
 Important
- The inside of the printer may be stained with ink. Be careful not to stain your hands or clothing when replacing the FINE cartridge. You can easily wipe off the ink from the inside of the printer with tissue paper or the like.
- Do not touch the metallic parts or other parts inside the printer.
- If the cover is left open for more than 10 minutes, the FINE cartridge holder may move and the Alarm lamp light. In this case, close the cover, then open it again.
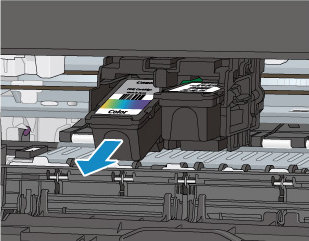
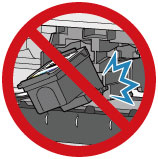
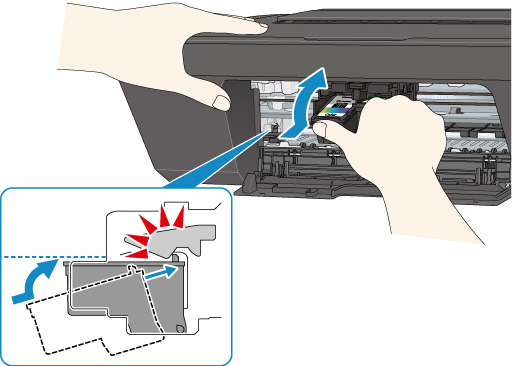
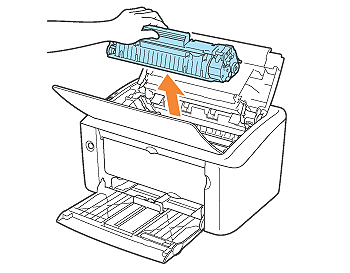
Remove the empty FINE cartridge.
Push down the FINE cartridge until it clicks.
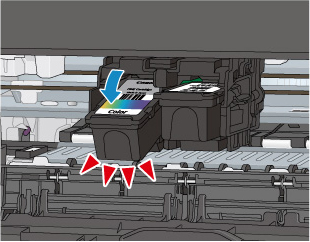
Remove the FINE cartridge.
Important- Handle the FINE cartridge carefully to avoid staining of clothing or the surrounding area.
- Discard the empty FINE cartridge according to the local laws and regulations regarding disposal of consumables.
Prepare a new FINE cartridge.
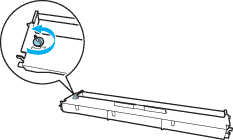
Take a new FINE cartridge out of its package and remove the protective tape (C) gently.
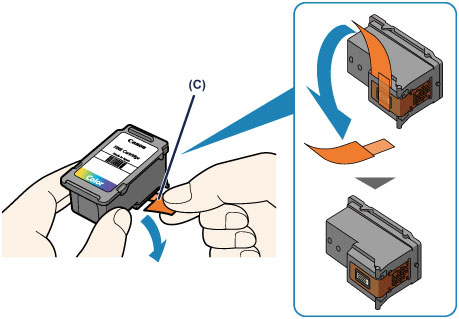
Important- If you shake a FINE cartridge, ink may spill out and stain your hands and the surrounding area. Handle a FINE cartridge carefully.
- Be careful not to stain your hands and the surrounding area with ink on the removed protective tape.
- Do not reattach the protective tape once you have removed it. Discard it according to the local laws and regulations regarding disposal of consumables.
- Do not touch the electrical contacts or print head nozzle on a FINE cartridge. The printer may not print properly if you touch them.
Install the FINE cartridge.
Insert the new FINE cartridge at a slant into the FINE cartridge holder.
The color FINE cartridge should be installed into the left slot and the black FINE cartridge should be installed into the right slot.
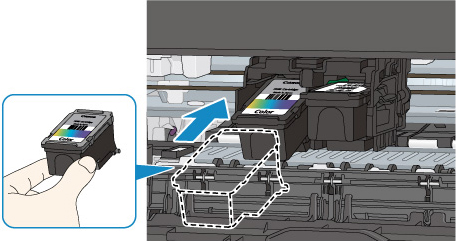 Important
Insert the FINE cartridge gently so that it does not hit the electrical contacts on the FINE cartridge holder.
Push the FINE cartridge in and up firmly until it snaps into place.

ImportantCheck if the FINE cartridge is installed correctly.
- The printer cannot print unless both the color FINE cartridge and black FINE cartridge are installed. Be sure to install both cartridges.
Close the cover.
Replacing the ribbon cartridge
 | Make sure the printer is turned off. |
 | Open the printer cover to the upright position, then pull it up to remove it. |

 Warning:
If you have just used the printer, the print head may be hot; let it cool for a few minutes before replacing the ribbon cartridge. |
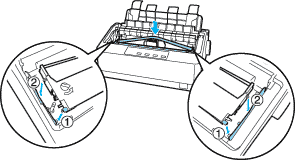
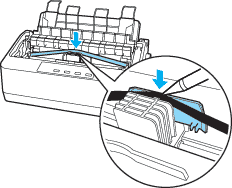
 | Remove the tension unit by squeezing the tension unit’s lock tabs gently and pulling the tension unit away from the printer. |
 | Make sure that the print head is in the middle of the printer. |
 | Remove the new ribbon cartridge from its package. |
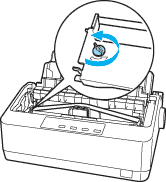
 | Turn the ribbon-tightening knob in the direction of the arrow to remove any slack from the ribbon so it is easier to install. |
 | Insert the ribbon cartridge into the printer as shown; then press both sides of the cartridge firmly to fit the plastic hooks into the printer slots. |
 Note:
Note:Do not touch the white cable inside the printer.  |
 | Use a pointed object, such as a ball point pen, to guide the ribbon between the print head and ribbon guide. |
 | Turn the ribbon-tightening knob in the direction of the arrow to help feed the ribbon into place; it should not be twisted or creased. |
 | Reinstall the paper tension unit. |
 | Reinstall and close the printer cover. |
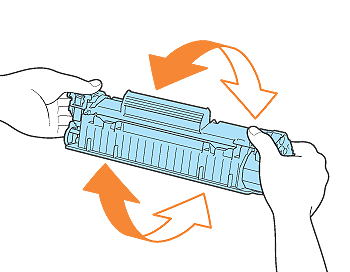
- If toner is not distributed evenly, this may result in deterioration in print quality.
- Be sure to shake the toner cartridge gently. If you do not shake the cartridge gently, toner may spill out.
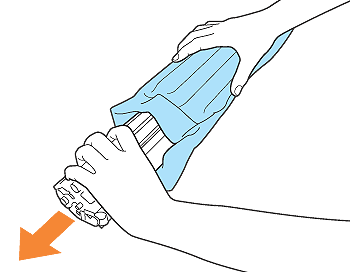
- Do not remove the drum protective sheet when shaking the toner cartridge.
- If toner is not distributed evenly, this may result in deterioration in print quality. Do not skip this step.
- Be sure to shake the toner cartridge gently. If you do not shake the cartridge gently, toner may spill out.
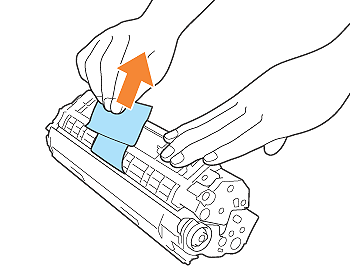
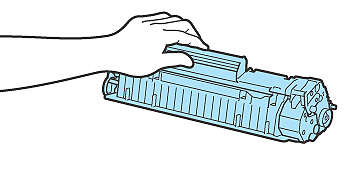
- Do not pull the sealing tape diagonally, upwards, or downwards. If the tape is severed, this may become difficult to pull out completely.
- Pull out the sealing tape completely from the toner cartridge. If any tape remains in the toner cartridge, this may result in poor print quality.